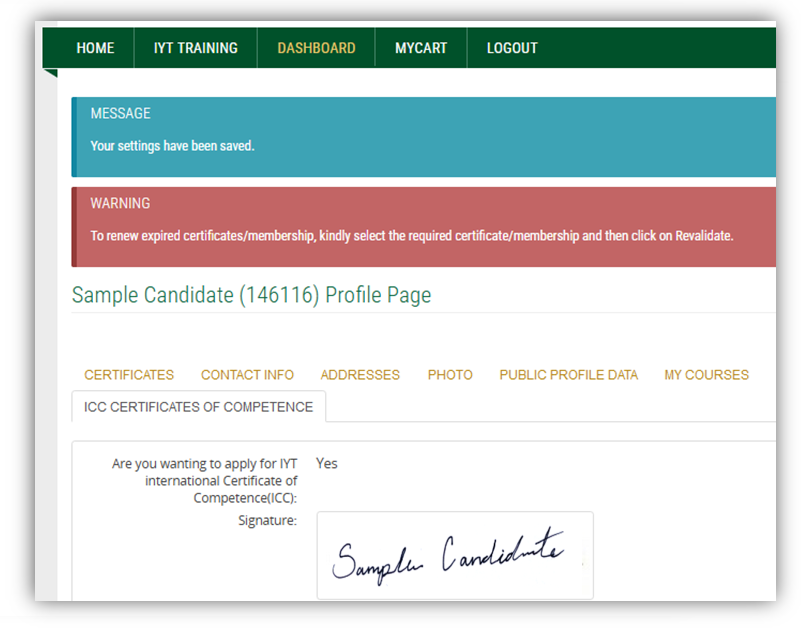
The UNECE require International Certificate of Competency
(ICC) cardholders’ signature to be present on all ICC cards. IYT are removing
the signature strip from the back of our cards and moving to digital
signatures. Therefore, we are implementing the addition of student’s signature upload
into their profile/account ID, in order to print this on their International
Certificate of Competency (ICC) card.
Please know that our server is protected with WAF,
Cloudflare and the communication is encrypted using SSL certificate from DigiCert.
Cloudflare adds layers of firewall as well as continuously monitors the access
being made to the server. It blocks any access that appears suspicious. We also
scan our servers regularly with antivirus applications. Therefore, you can rest
assured that your information and uploads are safe and secure.
The system is now configured to require the signature upload
before we can process/print an ICC. This
upload is quite simple. The candidate
must sign in blue or black ink on a white piece of paper and take a photograph
which they upload to their profile.
If this is a new profile/account ID, please follow these
steps to include the signature upload, as well as the steps to create an IYT
Account ID here Demo
Account ID Creation/ Student Registration .
1. Write your signature on a white piece of paper
using blue or black ink.
2. Take a photograph of the signature in good
lighting with no shadows on the page.
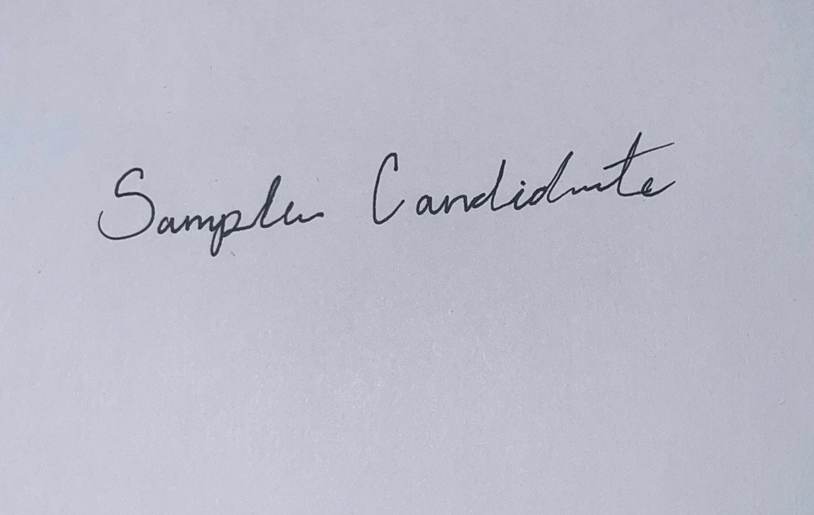
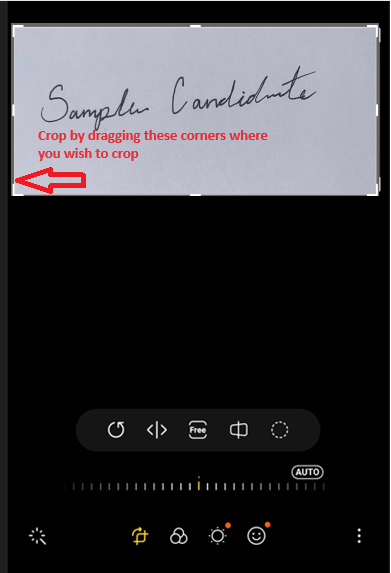
3. Crop the photo close to the edge of the signature.
If you have not used this feature before, please follow the instructions
below. Using the edit feature in the
phone’s camera, edit the photo and crop to the edges of the signature.
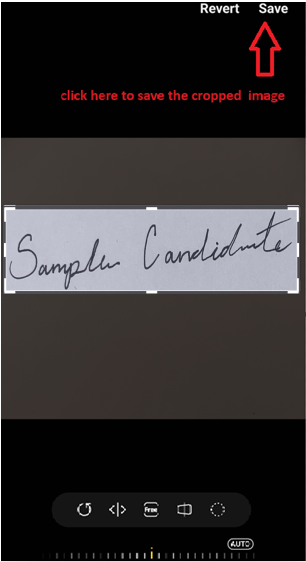
4. Click save after you have determined the size to
crop.
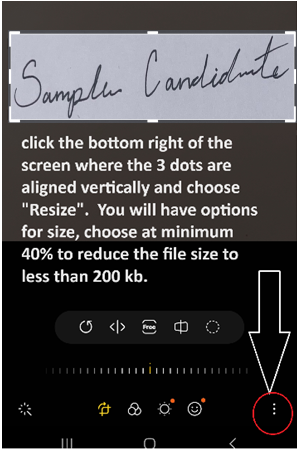
5. Please reduce the size of the image to less than
200 kb. Do this as shown below if you
have not used this feature. Remember to
click the save button on top right.
6. Log in to your profile to add the photo.
a. Go to the Dashboard menu, then Edit My Details
and follow the directions.

7. Click the dropdown arrow beside “No change of
image” and then click “Upload image”.

8. Click “select file / browse” for the photo

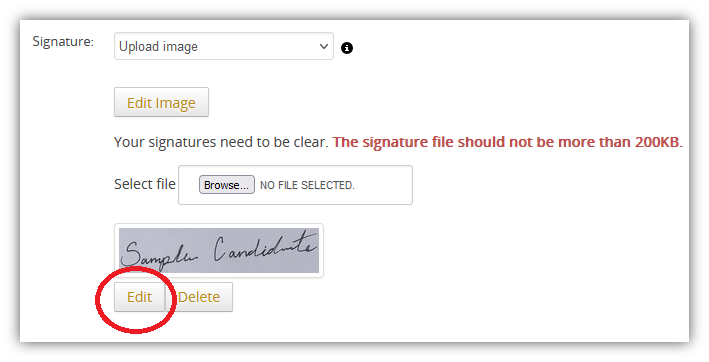
9. Your signature image will appear. If you wish to edit the image, please click
the edit button.
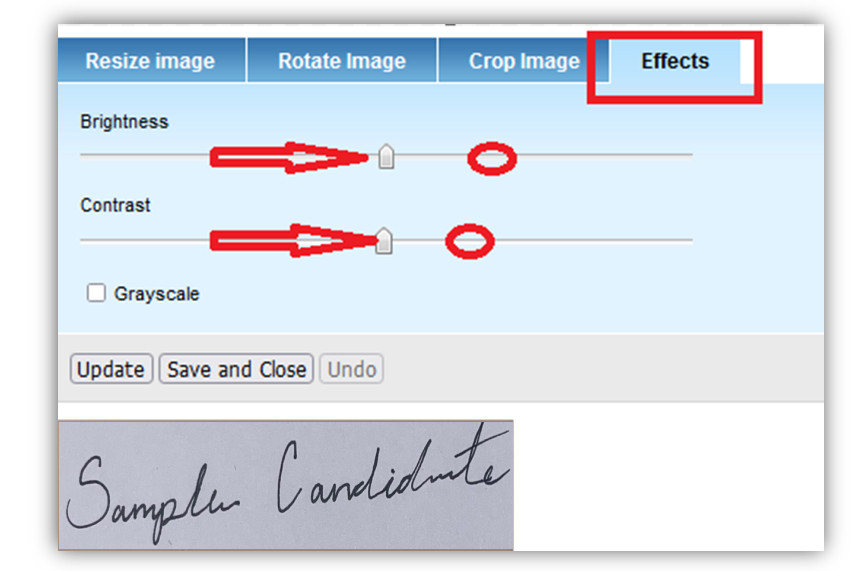
10. You can move the brightness up and the contrast
up slightly to take away the dark background. However, we will check this in production and alter if necessary.
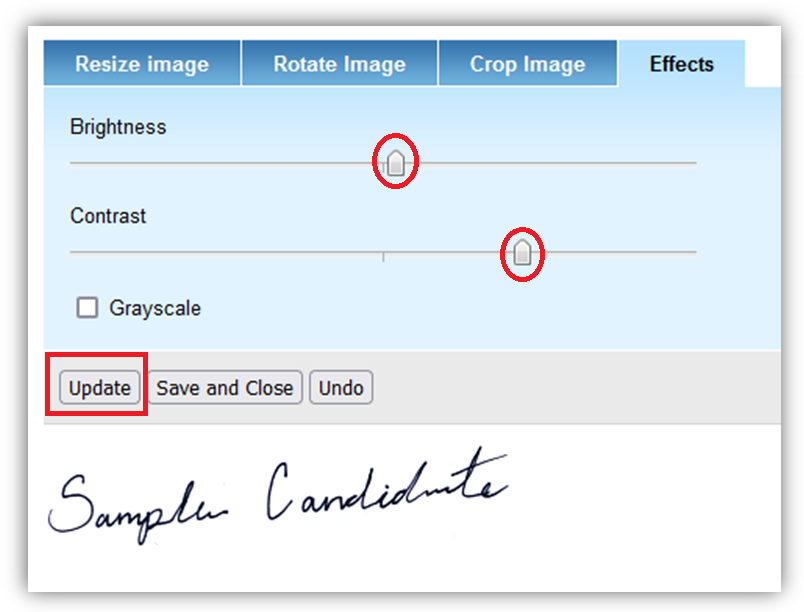
11. Here we have increased the brightness and the
contrast. You can see now that it
appears with a white background. Click
update, then save and close.
12. You can also crop the image and select the
signature area. This will help crop unwanted white space on the left, right,
top and bottom of the signature.
